
How to Put On a Great Kilt (Feileadh Mòr)
(A Practical Step-by-Step Guide)
What You’ll Need
-
A Great Kilt (typically 4–5 yards, depending on your size)
-
A thin belt (this is the structural belt that holds everything up)
-
A wide kilt belt (optional)
-
A brooch (optional, for securing the shoulder)
-
A sporran with chain or strap
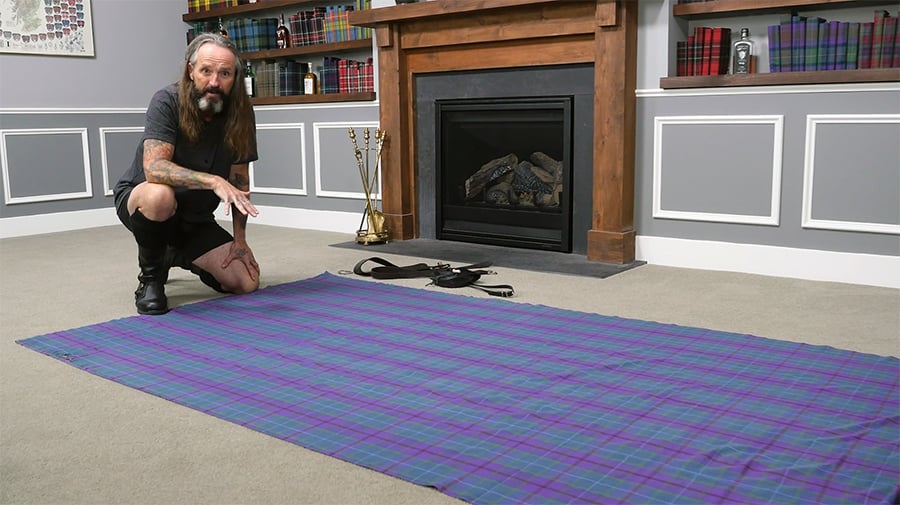
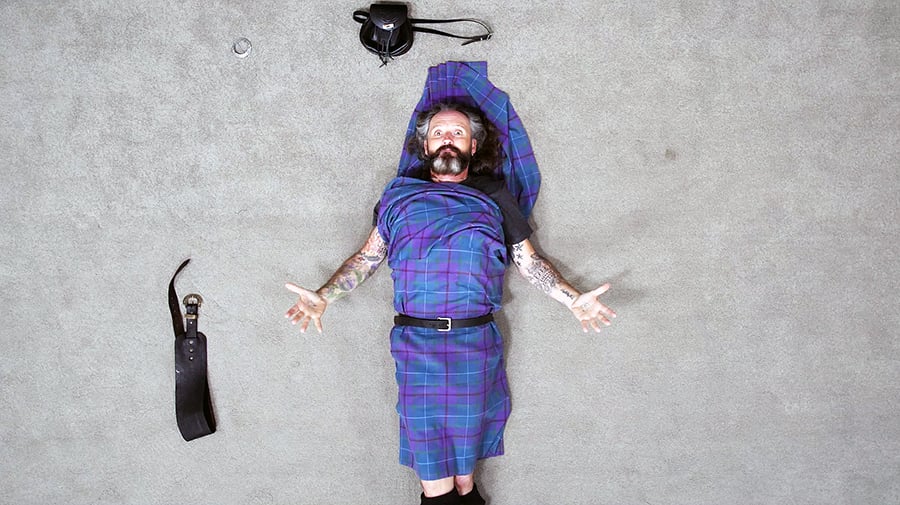
Step 1: Lay Out the Tartan
-
Spread your tartan flat on the floor.
-
Position it horizontally, with the top edge straight and even.
-
Leave enough unpleated fabric at each end to form the front aprons (these will wrap across the front of your body).
Tip: About the width of your body for each apron is a good starting point. You can adjust over time to suit your build and comfort.
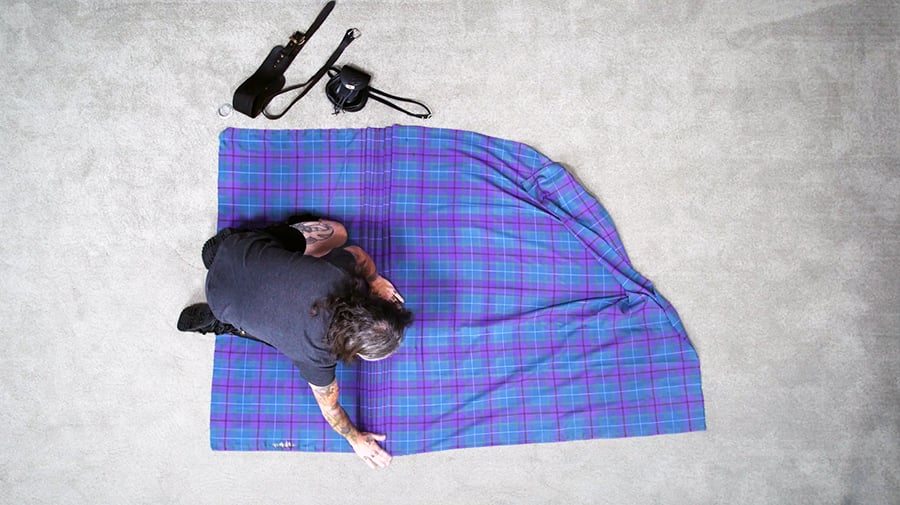
Step 2: Form the Pleats
-
Starting after the first apron section, begin pleating the fabric toward the center.
-
Pinch a section of fabric and fold it forward.
-
Continue forming pleats of equal depth, using the vertical lines (“sett” or stripe pattern) as a visual guide.
-
Smooth the pleats as you go to keep everything neat and aligned.
-
Stop pleating when you reach the section that will become the second front apron.
You should now have:
-
One flat apron section
-
A series of pleats in the middle
-
A second flat apron section
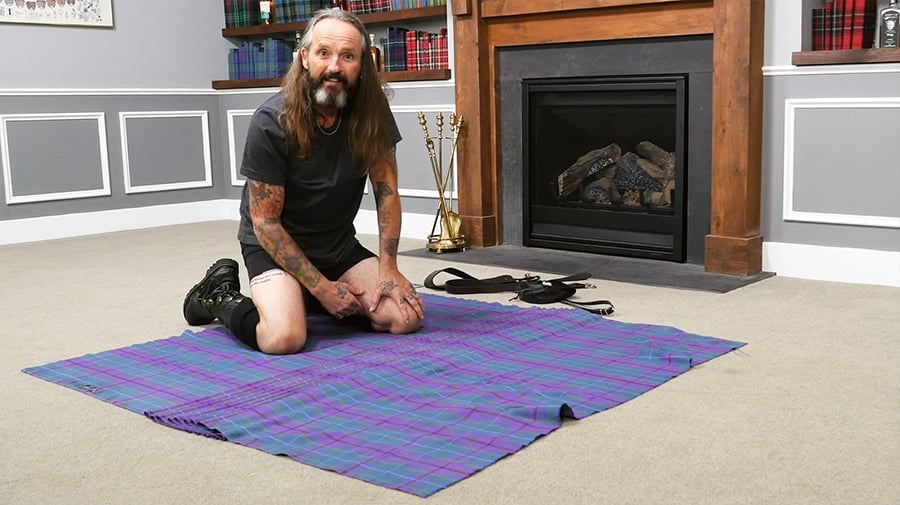
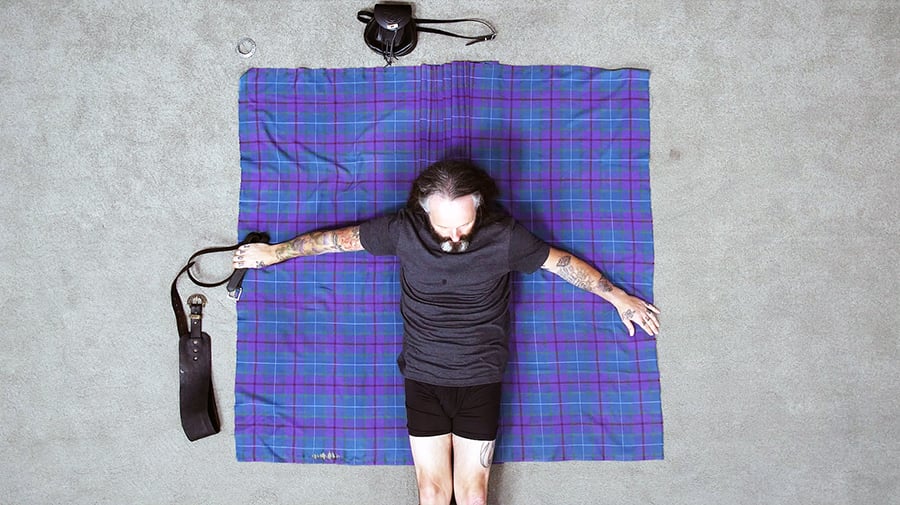
Step 3: Position the Belt
You have a few options, but here’s a straightforward method:
-
Place your thin belt underneath where your lower back will be.
-
Sit or lie down carefully on top of the pleated section, aligning your waist with the top edge of the kilt.
-
Make sure the pleats are centered behind you and the aprons are evenly positioned on either side.
The top edge of the kilt should sit around your natural waist.
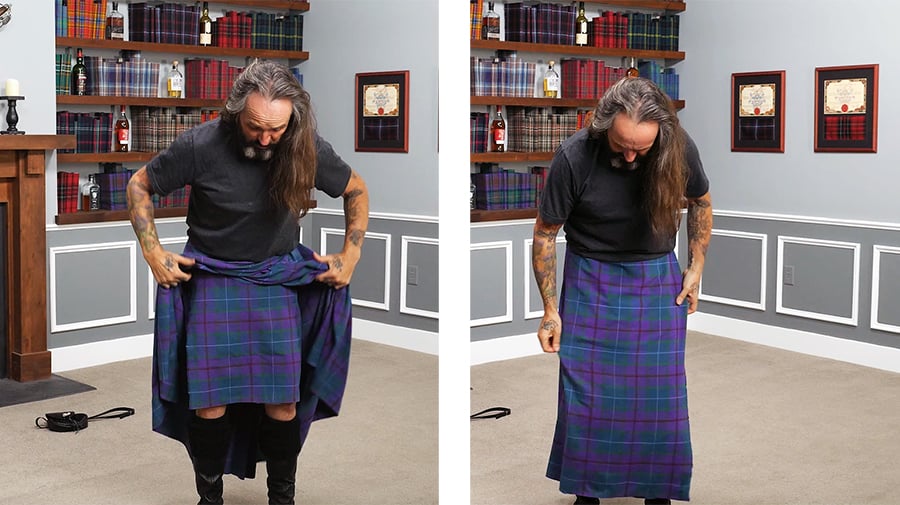
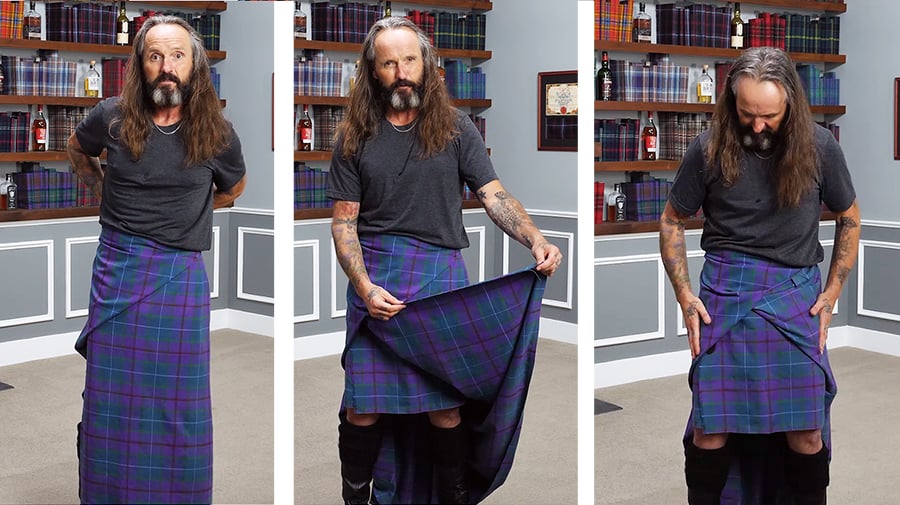
Step 4: Wrap and Secure the Kilt
-
Bring one apron across your body.
-
Bring the second apron across on top of the first.
-
Smooth the fabric across your front, ensuring it hangs evenly and reaches about the middle of your knees.
-
Wrap the thin belt around your waist and buckle it securely.
Important: This belt is what holds everything up. Make sure it’s snug but comfortable.
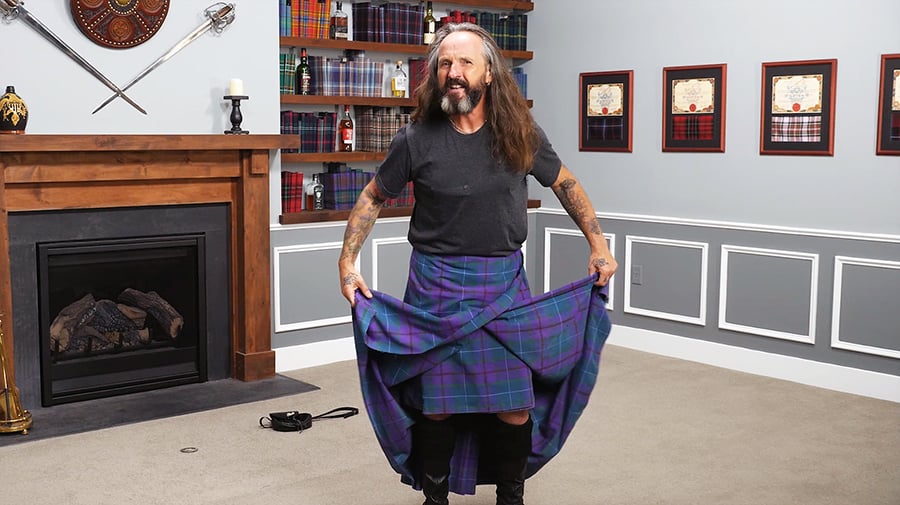
Step 5: Stand Up
-
Carefully stand up while holding the fabric in place.
-
The upper portion of the plaid will drop down behind you—this is normal.
-
Adjust the pleats and smooth the front as needed.
At this stage, the lower half functions much like a traditional kilt.
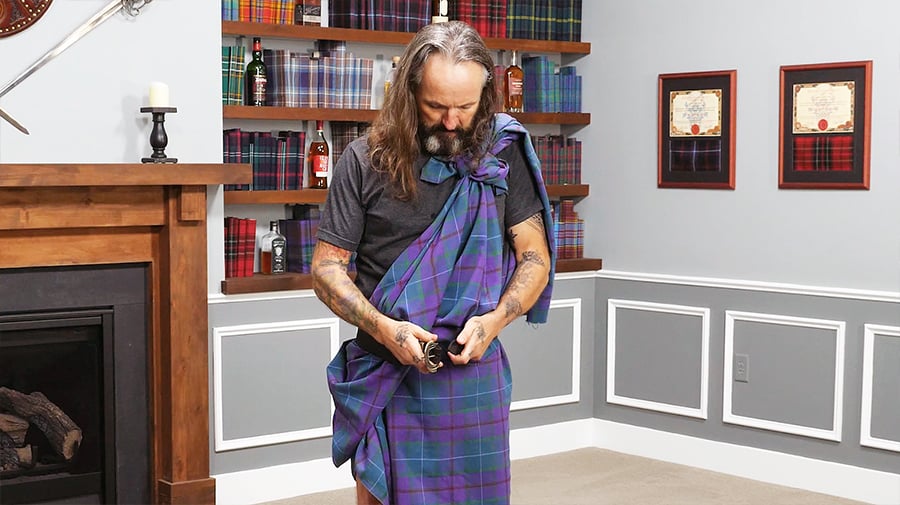
Step 6: Arrange the Upper Half
You now have several traditional styling options:
Option A: Over the Shoulder (Classic Look)
-
Gather the upper portion of the plaid.
-
Bring it up and over one shoulder, front and back.
-
Secure the front and back with a brooch or by tying a knot.

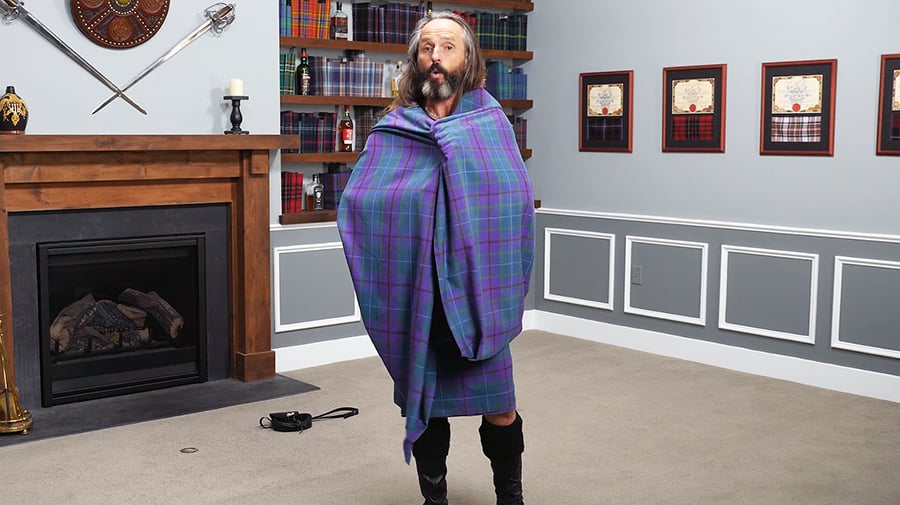
Option B: Cloak Style (Weather Protection)
-
Lift the upper plaid up and over your head or shoulders.
-
Drape it like a cloak for warmth or rain protection.
Option C: Tucked for a Clean Look
-
Fold about 10–12 inches of the upper fabric back.
-
Tuck the folded ends neatly over the thin belt at your back.
-
Ensure the lines of the tartan hang straight and clean.
Step 7: Add the Wide Belt (Optional)
-
Wrap the wide kilt belt around your waist over the kilt.
-
Buckle it comfortably.
-
Keep it level and straight across the front.
Note: The thin belt underneath is doing the real work. The wide belt is for support and appearance.
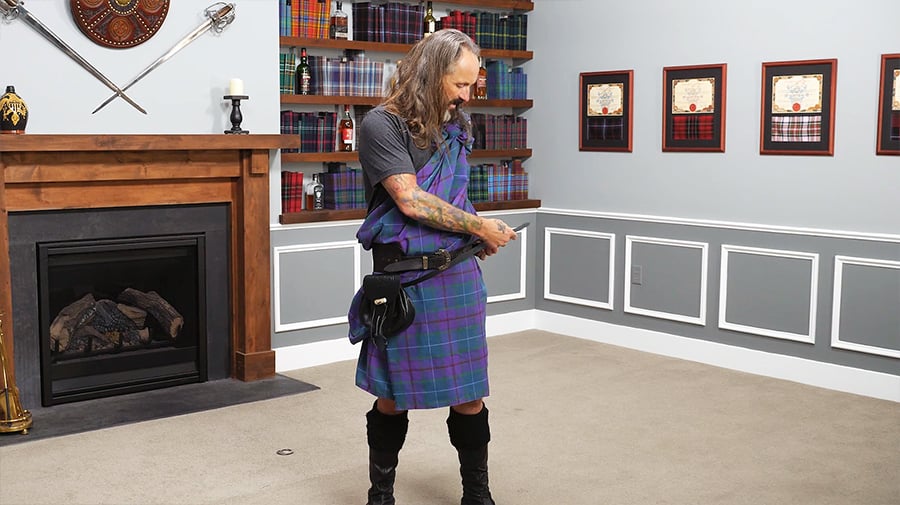
Step 8: Attach the Sporran
-
Position the sporran at the front center.
-
It should hang roughly three finger-widths below the belt.
-
Attach it either to the wide belt or with its own chain/strap.
Step 9: Final Adjustments
-
Ensure the kilt hangs to the middle of the knee.
-
Straighten the aprons across the front.
-
Check that pleats are centered in the back.
-
Make sure all belts are comfortable and secure.
-
Smooth out any visible rumples.
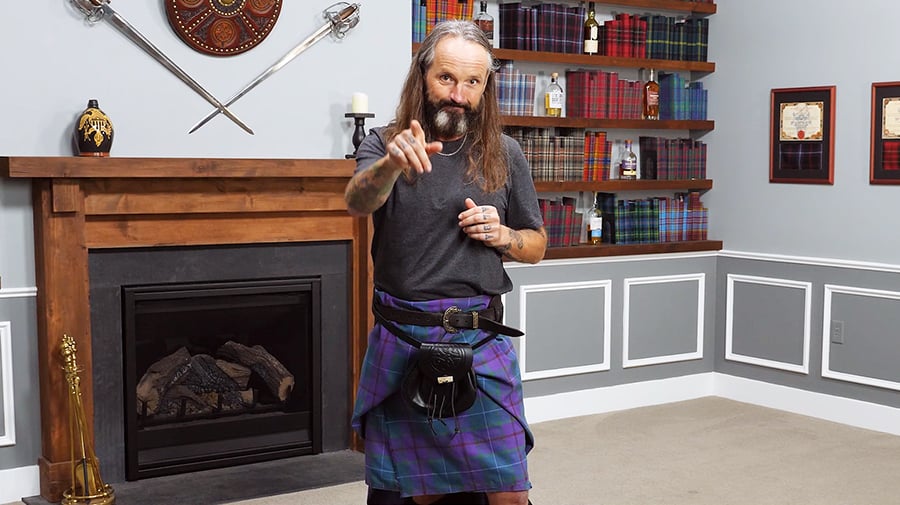
The overall look should be:
-
Clean and straight in front
-
Pleats centered in back
-
Upper plaid hanging naturally or secured neatly
-
Functional, comfortable, and dignified
A Final Word
The Great Kilt isn’t a fashion show piece—it’s the original utility garment of the Highlands. Don’t overthink it. The first time might feel awkward. The tenth time will feel natural. Eventually, it becomes muscle memory.
Wear it with pride!